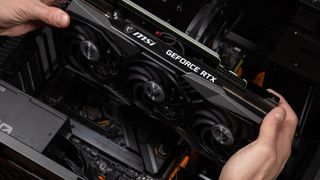
Getting your very first gaming PC, whether it’s freshly built or shipped pre-built, is an exciting prospect. In terms of specs for the cost they’re hard to beat as gaming machines; the level of performance will transform your gaming experience, and whether you have the best budget gaming PC or the best gaming PC in general, it will likely prove difficult to go back to laptops or consoles once you’ve invested in a desktop.
However, having bought or received that gaming PC, there are several steps you need to take in order to properly set up and enjoy your new rig. If you follow the steps outlined here, you’ll be on your way to playing the best PC games with ease.
Check for and remove packaging material

While this first step may appear obvious, it’s a vital one that many who invest in a pre-built gaming PC tend to skip over.
Many pre-built gaming PCs come with packaging material such as airbags and foam, which protect the fragile parts of a PC that could become damaged during transit.
Power-on your gaming rig without removing said material could result in your new PC overheating, with melting plastic and styrofoam on fragile parts likely to prove disastrous. As such, the first thing you should do once you’ve unboxed your new PC is throughly check the inside of the chassis and fans to ensure you’ve removed all traces of packaging.
Install and update your graphics drivers

On booting up your new gaming PC, you’ll need to update everything, including both Windows and your laptop’s graphics drivers. Leaving your machine on an older version of an OS won’t only impact gaming, but the PC’s general performance, too. In addition, having the right graphics drivers properly installed and updated will ensure that you get the most out of your GPU.
If you have an Nvidia graphics card, start by downloading the GeForce Experience tool, from where you can update to the latest gaming drivers. Or, head to Nvidia’s official website and download the drivers from there directly. There’s also the Windows Device Manager method, which involves you pressing the Windows + X keys, clicking on Device Manager or hitting the M key, selecting Display adapters from the menu, then right-clicking on your GPU and clicking Update driver.
If you have an AMD graphics card, the easiest option is to go to the AMD Drivers + Download Center, download, and then run the Radeon software. This will automatically detect and download drivers if you need them. You can also do this manually by using the AMD Product Selector to determine your GPU, and then download the correct drivers.
Optimize security and other settings

Security is another important yet overlooked step when setting up a gaming PC. Luckily, for Windows the built-in Windows Defender is solid at catching most threats. To avoid picking up any spyware, consider installing an ad block extension such as uBlock Origin on your web browser.
There are also plenty of other settings you’ll want to check, including privacy so companies can’t advertise to you. Simply go to the Start Menu and search for Privacy Settings.
Installing a monitoring application that lets you keep an eye on your PC’s thermal levels, frame rates, and other stats that are key to a well-running PC will also prove useful. While you’re at it, check your monitor settings, too, to ensure that it’s running at refresh rates supported by your graphics card.
You’ll also want to pop into the Windows settings menu, go to Windows Update and click Check for updates, because who knows how long your new machine has been sitting in a box on a shelf.
#set #gaming


